- Page d'accueil /
- Tools & Home Improvement /
- Building Supplies /
- HVAC /
- Weatherproofing /
- Window Insulation Kits /
- Window Insulation for Winter, 62''x42''-9PCS ...


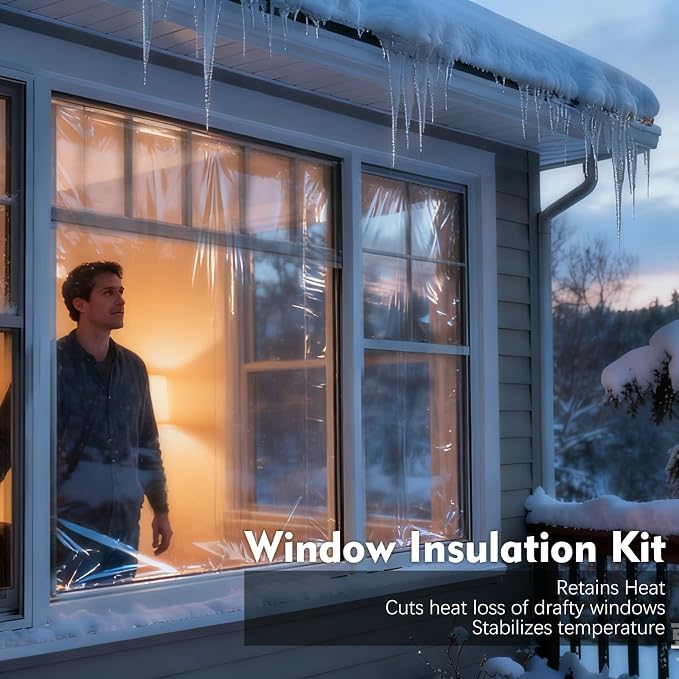



Window Insulation for Winter, 62''x42''-9PCS Window Insulation Kit, Window Plastic for Winterizing, Clear
 Importé depuis la boutique USA

Ubuy s'engage à protéger votre sécurité et votre confidentialité. Notre système avancé de sécurité des paiements garantit la confidentialité en chiffrant vos informations lors de la transmission grâce aux protocoles AES (Advanced Encryption Standards) et SSL (Secure Socket Layer). Vos coordonnées de paiement sont 100 % sécurisées car nous ne partageons pas vos informations de paiement avec des vendeurs tiers.


Livraison
rapide

Retour
gratuit*

Emballage sécurisé

Produits 100 % originaux

Conformité PCI DSS

Certifié ISO 27001





Détails du produit
| Brand Name | FTLKIBMD |
| Manufacturer | FTLKIBMD |
| Number of Items | 9 |
| Included Components | Double Sided Fabric Tape, Window Plastic for Winterizing |
| Item Weight | 1.1 pounds (500 grams) |
| Model Number | WIK042 |
| Manufacturer Part Number | WIK4262-9 |
| Item Thickness | 0.3 millimeters |
| Item Dimensions L x W | 62"L x 42"W (157.5 x 106.7 cm) |
| Coverage | 24192 square inches |
| Material Type | Plastic |
| Recommended Uses For Product | Instructions for Installing Window Insulation Plastic Film 1. Measure the window frame accurately: Use a tape measure to get precise width and height of the window frame (focus on areas where tape will be applied). Cut the plastic film: Cut it to match the window dimensions, and it’s recommended to make the film about 1 inch larger in both width and height for easy alignment and adhesion. 2. Prepare the frame for tape: Wipe the frame areas (where double-sided tape will go) with a clean, dry cloth to remove dust/debris. Apply the tape along the frame’s entire perimeter. Then peel off only the four corners (top-left, top-right, bottom-left, bottom-right) of the tape’s outer liner—do not peel off the whole liner. 3. Attach from the top-left corner: Align the film’s top-left corner with the frame’s top-left corner (where the tape liner is peeled). Press the film onto the exposed tape. 4. Pull the film taut horizontally to the top-right corner (ensure no wrinkles), then press the film there. Once aligned, peel off the remaining outer liner from the top edge’s tape and press the film firmly to stick fully. 5. Secure the left edge: From the attached top-left corner, pull the film taut vertically down to the frame’s bottom-left corner. Check for wrinkles, adjust, then press the film there. Peel off the remaining outer liner from the left edge’s tape and press the film firmly to secure it. 6. Secure the right and bottom edges: Start at the attached bottom-left corner, pull the film taut horizontally to the bottom-right corner. Confirm no wrinkles, then press the film there. Peel off the remaining outer liner from the right and bottom edges’ tape. Press the film firmly along these edges for full adhesion. 7. Trim excess film: Use a utility knife or sharp scissors to cut off excess film beyond the frame. Cut along the frame edge for a neat finish. |
| Material | Plastic |
| Brand | FTLKIBMD |
| Recommended Uses For Product | Instructions for Installing Window Insulation Plastic Film 1. Measure the window frame accurately: Use a tape measure to get precise width and height of the window frame (focus on areas where tape will be applied). Cut the plastic film: Cut it to match the window dimensions, and it’s recommended to make the film about 1 inch larger in both width and height for easy alignment and adhesion. 2. Prepare the frame for tape: Wipe the frame areas (where double-sided tape will go) with a clean, dry cloth to remove dust/debris. Apply the tape along the frame’s entire perimeter. Then peel off only the four corners (top-left, top-right, bottom-left, bottom-right) of the tape’s outer liner—do not peel off the whole liner. 3. Attach from the top-left corner: Align the film’s top-left corner with the frame’s top-left corner (where the tape liner is peeled). Press the film onto the exposed tape. 4. Pull the film taut horizontally to the top-right corner (ensure no wrinkles), then press the film there. Once aligned, peel off the remaining outer liner from the top edge’s tape and press the film firmly to stick fully. 5. Secure the left edge: From the attached top-left corner, pull the film taut vertically down to the frame’s bottom-left corner. Check for wrinkles, adjust, then press the film there. Peel off the remaining outer liner from the left edge’s tape and press the film firmly to secure it. 6. Secure the right and bottom edges: Start at the attached bottom-left corner, pull the film taut horizontally to the bottom-right corner. Confirm no wrinkles, then press the film there. Peel off the remaining outer liner from the right and bottom edges’ tape. Press the film firmly along these edges for full adhesion. 7. Trim excess film: Use a utility knife or sharp scissors to cut off excess film beyond the frame. Cut along the frame edge for a neat finish. See more |
| Product Dimensions (L x W x H) | 62"L x 42"W (157.5 x 106.7 cm) |
DESCRIPTION DU PRODUIT
Informations importantes
- Limitations : Pour les produits expédiés à l'international, veuillez noter que toute garantie du fabricant peut ne pas être valide ; les options de service du fabricant peuvent ne pas être disponibles ; les manuels, instructions et avertissements de sécurité des produits peuvent ne pas être dans les langues du pays de destination ; les produits (et les matériaux qui les accompagnent) peuvent ne pas être conçus conformément aux normes, spécifications et exigences d'étiquetage du pays de destination ; et les produits peuvent ne pas être conformes à la tension et aux autres normes électriques du pays de destination (nécessitant l'utilisation d'un adaptateur ou d'un convertisseur le cas échéant). Il incombe au destinataire de s'assurer que le produit peut être importé légalement dans le pays de destination. En cas de commande auprès d'Ubuy ou de ses filiales, le destinataire est l'importateur officiel et doit se conformer à toutes les lois et réglementations du pays de destination.
- Tous les produits listés sur Ubuy ne sont pas à vendre, Ubuy étant un moteur de recherche mondial. Les produits sont soumis aux réglementations en matière d'exportation et de commerce.
Actuellement indisponible.
We don't know when or if this item will be back in stock.
This item is not restrict in my country.(Please click on above link if this item is not restrict in your country, So our team will review and allow.)
Conforme PCI DSS et certifié ISO 27001:2022, avec des paiements chiffrés et une protection complète de l'acheteur pour chaque commande.
Assurance Ubuy
Profitez d'une expérience d'achat sereine avec des produits 100 % originaux, une sécurité de paiement conforme PCI DSS, une protection des données certifiée ISO 27001, la livraison transfrontalière la plus rapide, les retours gratuits* et un emballage sécurisé pour chaque commande.